牛哇牛哇
国内 Docker 服务状态 & 镜像加速监控
https://status.1panel.top
3 个赞
昨天我搞了一下午,我以为我得网有问题,又手动删除docker等等,最后把系统弄崩溃了,又重装系统,今天早晨又不行,都崩溃了。 刚上论坛才看到。
5 个赞
docker 服务可不可用我们也收不到通知,建议出现问题就逛一下论坛吧 或者 加我们的微信群
1 个赞
“status”:“Pulling from azul/zulu-openjdk-debian”,“id”:“17”}
1 个赞
因为某种原因,全国的dockerhub镜像站都关了,我这个专门玩docker的真受伤
2 个赞
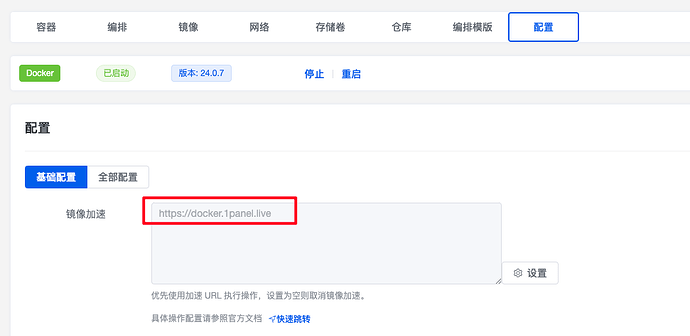
用1 个不稳定, 我按照论坛上提供的方法,cloudflare 绑了个自己的域名。
原贴 自建Docker Hub加速镜像 (lty520.faith)
在面板 左侧找到 Workers 和 Pages ,然后点击右侧的 创建应用程序 、创建 Worker ,修改一个好记的名字,部署
接下来编辑代码,将 worker.js 的内容替换为下面内容worker.js
import HTML from './docker.html';

export default {
    async fetch(request) {
        const url = new URL(request.url);
        const path = url.pathname;
        const originalHost = request.headers.get("host");
        const registryHost = "registry-1.docker.io";

        if (path.startsWith("/v2/")) {
        const headers = new Headers(request.headers);
        headers.set("host", registryHost);

        const registryUrl = `https://${registryHost}${path}`;
        const registryRequest = new Request(registryUrl, {
            method: request.method,
            headers: headers,
            body: request.body,
            // redirect: "manual",
            redirect: "follow",
        });

        const registryResponse = await fetch(registryRequest);

        console.log(registryResponse.status);

        const responseHeaders = new Headers(registryResponse.headers);
        responseHeaders.set("access-control-allow-origin", originalHost);
        responseHeaders.set("access-control-allow-headers", "Authorization");
        return new Response(registryResponse.body, {
            status: registryResponse.status,
            statusText: registryResponse.statusText,
            headers: responseHeaders,
        });
        } else {
        return new Response(HTML.replace(/{{host}}/g, originalHost), {
            status: 200,
            headers: {
            "content-type": "text/html"
            }
        });
        }
    }
}
新建一个名为 docker.html 的 文件,内容如下
docker.html
<!DOCTYPE html>
<html>
<head>
<meta charset="utf-8" />
<meta name="viewport" content="width=device-width, initial-scale=1" />
<title>Mirror Usage</title>
<style>
html {
height: 100%;
}
body {
font-family: "Roboto", "Helvetica", "Arial", sans-serif;
font-size: 16px;
color: #333;
margin: 0;
padding: 0;
height: 100%;
display: flex;
flex-direction: column;
justify-content: space-between;
}
.container {
margin: 0 auto;
max-width: 600px;
}
.header {
background-color: #438cf8;
color: white;
padding: 10px;
display: flex;
align-items: center;
}
h1 {
font-size: 24px;
margin: 0;
padding: 0;
}
.content {
padding: 32px;
}
.footer {
background-color: #f2f2f2;
padding: 10px;
text-align: center;
font-size: 14px;
}
</style>
</head>
<body>
<div class="header">
<h1>Mirror Usage</h1>
</div>
<div class="container">
<div class="content">
<p>镜像加速说明</p>
<p>
为了加速镜像拉取,你可以使用以下命令设置registery mirror:
</p>
<pre>
sudo tee /etc/docker/daemon.json <<EOF
{
"registry-mirrors": ["https://{{host}}"]
}
EOF
</pre>
</br>
<p>
为了避免 Worker 用量耗尽,你可以手动 pull 镜像然后 re-tag 之后 push 至本地镜像仓库:
</p>
<pre>
docker pull {{host}}/library/alpine:latest # 拉取 library 镜像
docker pull {{host}}/coredns/coredns:latest # 拉取 library 镜像
</pre>
</div>
</div>
<div class="footer">
<p>Powered by Cloudflare Workers</p>
</div>
</body>
</html>
接下来,点击右上角的 部署 ,稍等片刻
最后,返回面板,在 设置 ,触发器 处设置一个自己的域名,一切就大功告成了不建议使用自带的 workers.dev 的域名,被墙了
3 个赞
1Panel-huiwan:
此加速地址为临时地址,可能会出现不可用的情况
仅限境内机器使用
请勿恶意刷流量
建议建立永久地址,并供境外机器使用。以求长远,以壮野心。
